To apply the sealer at your driveway, you need to follow simple steps.
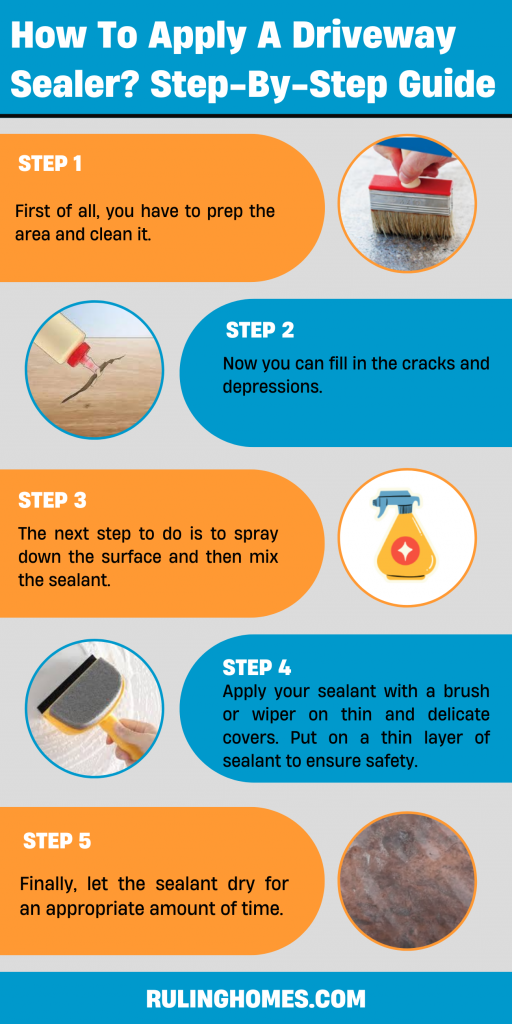
- First of all, you have to prep the area and clean it.
- Now you can fill in the cracks and depressions.
- The next step to do is to spray down the surface and then mix the sealant and apply it.
- The last but most important step is to let the sealant dry for an appropriate amount of time.
Table of Contents
Why do You need to Apply Sealant to Your Driveway?
Sealing an asphalt driveway, otherwise called “hot top” or “blacktop,” is a time-consuming job, but it is also fundamental as water soaks in and can break in the material and settles down at the base.
The strength of the base is damaged, which can create potholes. Breaks loaded up with water are likewise a sincere greeting for harm from freezing in colder environments.
Indeed, even in warm environments, grass can start to grow up through breaks on the edges of the surface. Harm from sunlight and oil or gas spills are other valid justifications for sealing your driveways.
Also Read: Best Sealants for Metal Roof
Driveway sealer has to be applied within the 6 months of building your home and then afterward again every one to three years from thereon. In geographical areas with brutal winters, you have to seal driveways once each year.
When getting ready for sealing asphalt driveways, stand by until the ground temperature is 45 degrees Fahrenheit or higher and rain isn’t predicted for the next three days.
Tools You’ll Need
- Hardened shuddered brush
- Push brush
- A garden hose
- Application brush
- Gloves
- Pressure washer
Also Read: How to remove concrete sealer from stamped concrete?
Materials You’ll Need
- Driveway sealer (sealant)
- Fixing compounds
- Oil/gas stain cleanser
Detailed Guidelines to Apply Driveway Sealer
1. Prep the Area
First of all, you have to prep the area. You have to eliminate the grass overhanging the edges of the surface. Then you can clean the surface with a push brush.
Utilize a hardened shuddered brush to clean any oil or gas stains utilizing a cleanser specially made for this reason, which can be found at the hardware store.
2. Fill in Cracks and Depressions
The next step is to fill in the cracks and depressions. Use fixing compounds, accessible at home improvement depot. You have to fill in all the breaks or depression on the surface. Follow instructions on the label for drying time for these mixtures.
3. Shower Down the Asphalt
Clean the surface with a garden hose or a pressure washer. You have to shower down the surface with a good splash to eliminate dirt missed in the general process. Take some time to let the surface dry.
4. Blend the Sealant
The next step is to mix the sealant. While keeping the lid closed, you have to shake the sealant container to let the material inside blend together.
When the container is opened, keep on occasionally blending, so the sealant stays very much blended.
5. Apply the Sealant
Starting in one corner, pour a portion of the driveway sealer on the surface. You will presumably think that it’s almost effortless to deal with one little square part of around 10 to 20 square feet all at once instead of doing long limited strips.
Apply your sealant in delicate and thin covers with the help of a brush or wiper. Remember that putting on a thicker sealant layer won’t give extra safety. You have to follow the manufacturer’s directions and keep applying thin layers. It applies to the application of concrete sealers too.
Driveway sealers are harmful, so keep away from skin contact with them by dressing appropriately and utilizing a mask to save yourself from harmful fumes.
6. Allow the Sealant to Dry
Drying time is at least 24-48 hours. During this time, you have to limit the traffic of any sort on the surface of your driveway. Place some barrels at the entry of your driveway to prevent vehicular access.
You can also just utilize the vacant sealer tubs. For an extra layer of security, you can use some yellow construction tape around the area.
Conclusion:
Applying a sealer to your driveway is an important job that has to be done every now and then. You have to follow safety instructions and allow appropriate time for the sealer to dry before you can use it.

I grew up on a small farm in New Jersey. We had a big family because my parents, my uncles and aunties all were living together on this farm so, you can imagine, it was always over crowded with people. But living in farm was really great because we had to do everything on our own and I learned so many things from my parents and uncles and aunties and that is where I found my passion for fixing things, whether it is renovating or designing, I was always there. Read more