Bathroom exhaust fan wiring is done in a few simple steps.
- Hook up the bathroom exhaust fan wiring by eliminating the electrical junction box cover.
- The next step is to connect the house wires to the fan wires
- neutral white to neutral white, ground to ground, and hot black to hot black, and you are done.
Let us discuss the process in detail for helping you install or replace the toilet exhaust fan.
Table of Contents
Make the Wire Connections
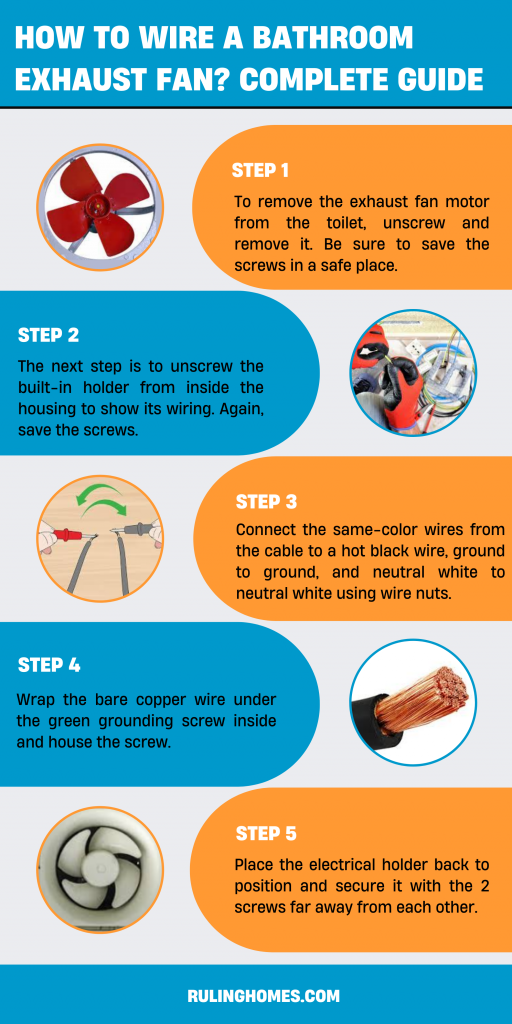
- From the toilet, unscrew and take away the blower motor from the exhaust fan housing. Save the screws in a box or a place where you do not lose them.
- The next step is to unscrew the built-in holder from inside the housing to show its wiring. Again, save the screws.
- Use wire nuts to hitch same-color wires with those from the cable you fed into the housing neutral white to neutral white, ground to ground, and hot black to hot black.
- Wrap the bare copper wire under the green grounding screw inside and house the screw.
- Place the electrical holder back to position and secure it with the 2 screws far away from each other.
Bathroom Circuits
A basic wiring plan for a bathroom includes a 20-amp, GFCI-protected circuit for the holders and a 15-amp general light circuit for the switches, exhaust fan, and lighting fixtures.
In some areas, the lighting and holders must get on separate circuits so that if a holder trips the breaker, the lights won’t leave.
In other areas, it’s allowed to put in the lighting, holders, and a typical exhaust fan on one 20-amp circuit, provided the circuit serves only the toilet and no other rooms.
If the exhaust fan features a built-in heater, it must have a 20-amp circuit. This is often called a “dedicated” circuit because it serves just one appliance or fixture. Heat lamps, wall heaters, and other built-in heating appliances can also require dedicated circuits.
Safety Tips for Wiring Bathroom Circuits
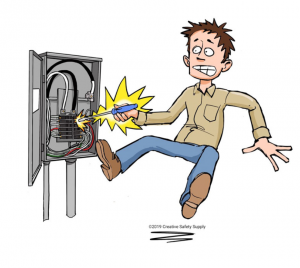
Having a ground fault circuit breaker installed in your bathroom circuit is the best solution as it minimizes the risk of electrocution. Exhaust fans also help with the security of toilet circuits by mitigating moisture build-up from steam.
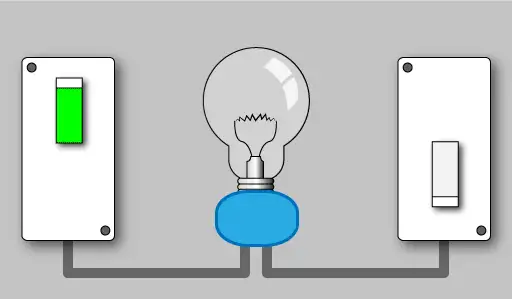
Another essential safety tip is using splash-proof switches on all bathroom devices, which allows you to turn the switch on and off with damp hands securely. Keeping your circuits separate also can help with bathroom safety, as a faulty one circuit won’t interfere with other circuits.
If you’re concerned about the security of your bathroom circuits, it might be best to consult an electrician to check them over.
Maintenance
Throughout normal use, your exhaust fan will become clogged with dirt. Regular cleaning will maintain its productivity and improve the ambient air quality. Vacuum the grille every 3-6 months. If deep cleaning is required, start by turning off the power supply at the electrical panel.
Remove the fan’s cover and wash with hot water. Use a little brush to remove dust and debris out of the motor and fan blades, then wipe the blades with a damp cloth. Lookout that each part is thoroughly dry before you reassemble the fan and reconnect the electricity.
Required Tools
Have the required tools for this project lined up before you start. It will save your time and frustration.
- 4-In-1 Screwdriver
- Chalk Line
- Drill/Driver – Cordless
- Utility Knife
- Drywall Saw
- Dust Mask
- Hammer
- Jigsaw
- Non-Contact Voltage Tester
- Pry Bar
- Gloves, Trouble Light, And Goggles
Required Materials
Avoid last-minute shopping by having all of your materials ready before time. Which includes:
- 1/2-In. Self-Tapping Sheet Screws
- 3/8-In. Self-Tapping Sheet Screws
- 4-In. Aluminum Duct (Straight and Elbow)
- Roof Cement
- 4-In. Flexible Insulated Duct
- Adjustable Clamps
- Caulk
- Roof Cap
- Vent Fan
- Wire Connectors
Conclusion
Bathroom exhaust fan wiring is a very tricky job. You need to make sure there is no electricity power in the circuit before you start working on it. Make sure you have all the tools and material needed for this task.

I grew up on a small farm in New Jersey. We had a big family because my parents, my uncles and aunties all were living together on this farm so, you can imagine, it was always over crowded with people. But living in farm was really great because we had to do everything on our own and I learned so many things from my parents and uncles and aunties and that is where I found my passion for fixing things, whether it is renovating or designing, I was always there. Read more